Glue techniques? Sew-in techniques?
Everything about hair weaving
Items customers pick up with hair extension products are typically a needle and thread or hair glue. That is because the most common methods of applying hair weaves involve gluing or sewing. A great array of video content is offered via social media nowadays, and some of the mega hits are ways to attach hair extensions while looking natural. What are the new and innovative methods beyond traditional glue and sew-in techniques?
Let’s start with the basics and move on to newer techniques for hair weaving.
1. The basic glue method
Glue techniques provide extra volume to hair. You start with thoroughly dried hair after shampooing. Divide up hair into sections, and starting from the back hair, tie the top portion and leave the rest down. Apply a small amount of glue to the weaving track (do not apply glue to the hair) and wait for a few seconds till the glue becomes sticky. Avoid glue touching the scalp as much as possible and work along the hair. You can use a blow hair dryer at a low-temperaturesetting to accelerate the glue setting. Glued hair extensions can last up to two months, but experts recommend that you do not leave the glued hair for more than a month.

A YouTuber explains the basics of glue techniques. ©TIERRA J Youtube
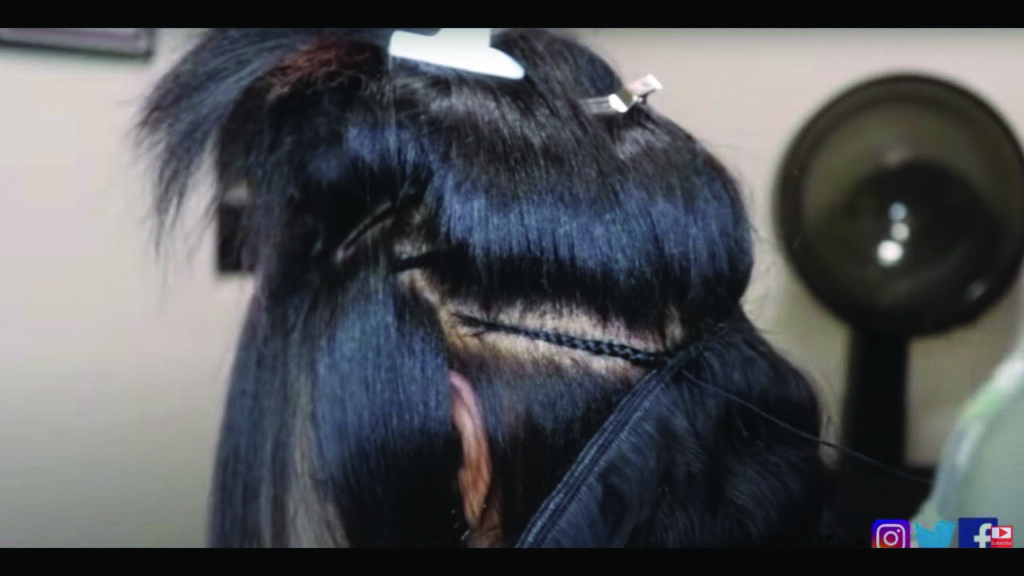
2. Sewing method for a more secure application
You shampoo and condition hair preferably with products containing argan oil or of similar kinds. You will need plenty of moisturizing products to keep your scalp moist to prevent tightening of the scalp. The best way to provide a solid foundation for hair extensions is to cornrow your hair tightly. The more solid the foundation you have the firmer your hair extensions will be affixed to your hair. For an even more natural look, you will leave some hair on the side and back without applying for hair extensions. If you have thinning or thinner than usual hair, you can add extra synthetic hair within braids that can securely hold on to your hair extensions. You bring the threaded needle underneath the cornrowed hair and go around it twice before making a knot, and you repeat the sewing to affix the entire hair.
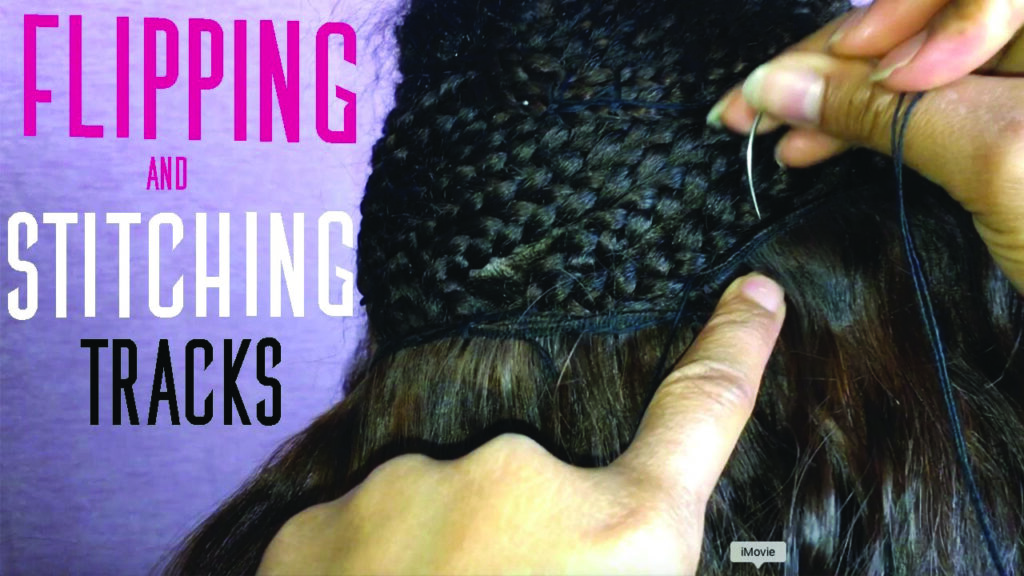
Explaining how to firmly affix hair onto cornrows using a needle and thread. ©It’s Me Miss Ruby Youtube
3. Sew-in without braids?
There is a sew-in technique that does not require your hair to be braided. It is called flat track or skip tracks, and it is a preferred method for women who struggle with maintaining cornrows or want no glue residue on their hair. It utilizes microbeads coated with silicone, which can be affixed using pliers to push it down toward the scalp working along each section of hair. Depending on how quickly your hair grows, it can last up to 6-8 weeks.
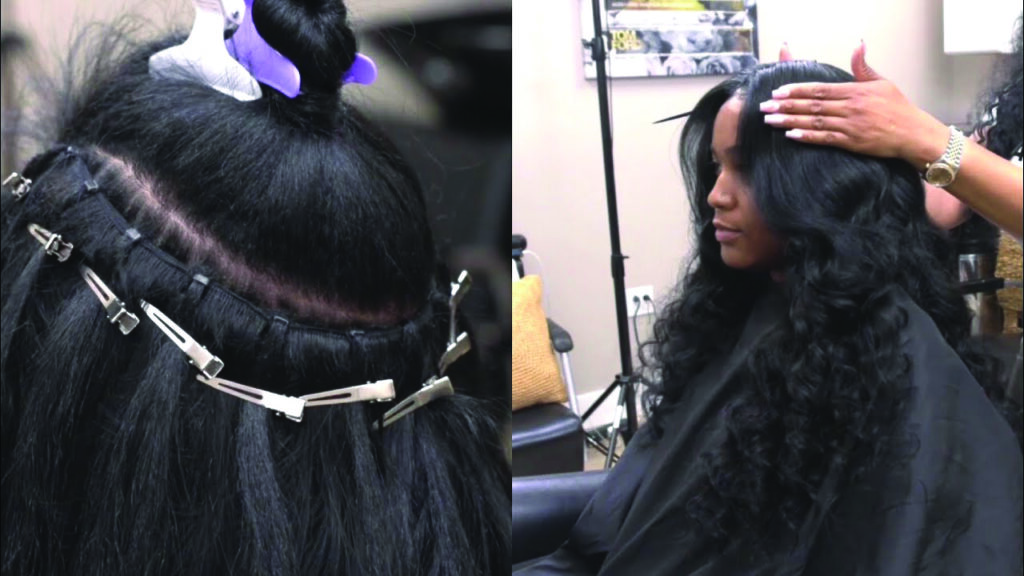
©MeechieDeFranco Youtube
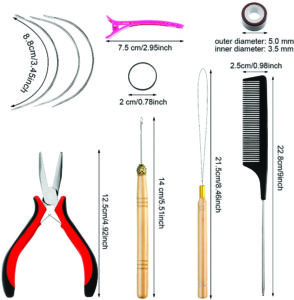
A wide range of tools for braidless sew-in are available at Amazon.com
4. Fusion method to reduce scalp damage
Hot fusion, which is most commonly used, attaches extension hair onto the client’s hair at the root using a special tool called a fusion connector. It works better for people who have hair strong enough to withstand the added weight of the hair and the adhesive. For this technique, you will be applying for trackless hair extensions, so it would be almost as natural as your own hair. You can style it freely and keep it for up to a year if maintained properly. The fusion connector resembles a glue gun, and you will be needing help from professional stylists. Fusion hair comes in both hot and cold kinds. Hot fusion utilizes keratin-based adhesive to attach hair, and your stylist will melt the keratin base with a fusion hair iron to install u-shaped tips that wrap around the hair. Cold fusion is similar to the above-mentionedmethods using microbeads.
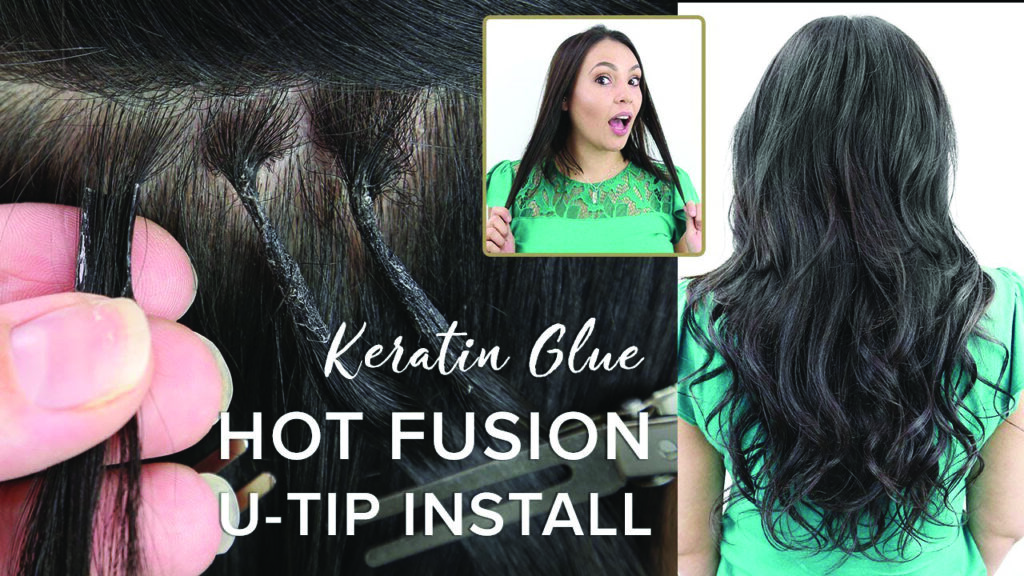
As shown in the picture, the melted silicone attaches to the root area. ©Perfect Locks Youtube
5. Net techniques to protect the scalp
Originally, a net is installed over the scalp and hair root for people with hair loss to provide a solid foundation for weaving. If you apply a net over cornrows, you can most effectively prevent hair damage due to the pulling of hair, unavoidable during sewing. Using this technique, you can apply for hair extensions in the area without cornrows but covered with the net. Also, because you sew the hair extensions into the net, you can direct the hair in any way for creative styling. You will be styling the hair regardless of the shape, direction, and position of the cornrows.
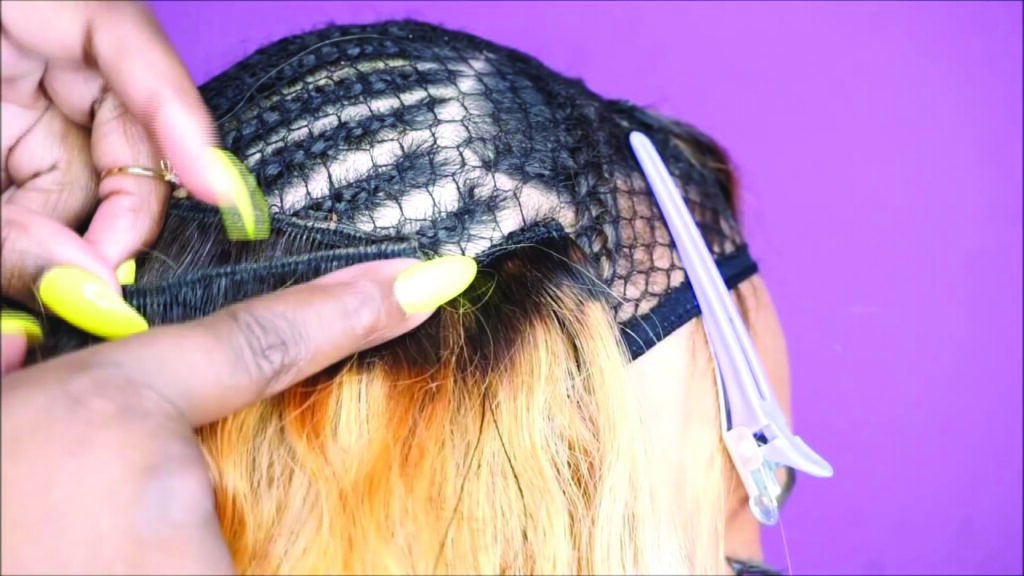
How to sew in the hair on the net applied over cornrows. ©Deeper Than Hair TV Youtube
6. Partial sewing for a natural look
The methods discussed so far would braid the entire head and apply for hair extensions all over the head. Instead, partial sewing involves leaving some hair while braiding from the tip of your hair. As a result, the leftover hair would cover the braided hair. In this method, you would have sew-in hair extensions on the braided parts which are covered with leftover hair. For a natural look, your own hair should have a similar hair texture as the hair extensions. By avoiding braiding the entire hair, you can protect the scalp and bring your own hair’s texture to the play for a natural-looking style.
You would sew hair extensions to the partially braided hair. ©Stylist Lee Youtube