Glue-In and Sew-In Weaving
Let’s know them inside out!
It’s no secret that one of the biggest sellers in beauty supplies is weaved hair. Weave hair refers to human hair or synthetic fiber that is tightly bound together with thread to create a weft, a large amount of hair sewn or tied into a bundle. The process of attaching the wefts to the scalp with a thread attached to a needle is called sew-in weaving, and attaching the wefts with hair glue is called glue-in weaving. In this article, we’ll cover both methods in more detail.
1. Key Terms for Understanding Weave Hair
–Extension: refers to synthetic or human hair that is typically secured with clips, tape, glue, etc. to add volume and length to a person’s natural hair. Braiding and clip-ins are also types of extensions, with the only difference being how they are attached to the hair.
-Closure: a closure is a circular piece of hair that covers the crown of the head in addition to weaves. It is used to create a neat look at the top. It is usually made of silk or lace, and some weave products come with a closure in the package.
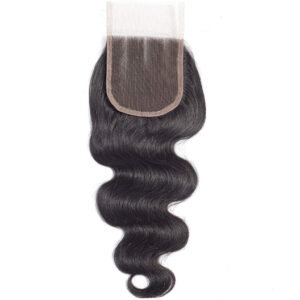
A closure with body- wave- styled hair on lace. This closure comes with hair that is individually tied, allowing natural-looking styling.
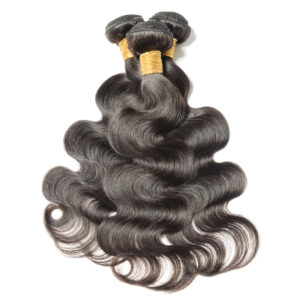
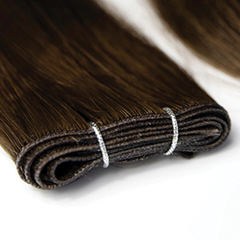
-Weft: part of the hair piece that is mechanically bound to keep the strands from falling out and tied tightly with thread is called the weft. If it’s too thick, it won’t make a smooth transition when attached to the head, and if it’s too thin, the hair can be pulled out easily.
2. Quick Weave, Another Name for Glue-In Weaving
Glue in weaving has the advantage of being much cheaper to style because it can be styled in less time. This method is sometimes called quick weave because of its time-saving nature. It lasts up to five weeks and can be done with a wig cap over a cornrow where weaves are attached to the cap with hair glue. Wig caps can be worn with or without a cornrow, and sometimes weaves can be glued directly to the natural hair without caps. Even after wearing a wig cap, the glue can still penetrate to the scalp, so there are various ways to create a protective barrier over the hair and head before quick weaving. To remove glue, it’s best to use a glue remover made specifically for this purpose. Styling weave hair products over a wig cap is quite like making a wig.
YouTube @ Roxy Bennett
HOW I PREP FOR A QUICK WEAVE! | ROBERT DIAMOND’S BOND PROTECTIVE SHIELD! | DETAILED VIDEO
This video explains how to prepare the hair, using a molding product to protect the scalp from the hair glue.
“Old School” Glue in Weave Tutorial | Asteria Kinky Straight Hair
YouTube @ASTERIA HAIR
This tutorial explains how to glue a weave directly onto your hair without using a wig cap. Because the hair has a kinky texture, extensions hold up well after glued directly.
Glue-in weaving, this is why it’s so popular!
As briefly mentioned above, they are inexpensive to install and don’t require a lot of upkeep other than wrapping them up for a night’s sleep. Because the wig caps are worn before hair glue is applied, they’re gentler on the scalp than sew-in weaves and take only up to two hours to install. Some products come pre-cut into different lengths of weft, making them even more convenient to use.
TARA 1-2-3 (27 PCS) by Outre. It is one of the most popular products for quick weaving and comes pre-cut in 27 pieces, making them easy to style by simply gluing them in series.
Glue-in weaving, what are the drawbacks?
Glue-in weaves have the advantage of being easier to install and less costly, but they only last about a month, as the hair attached to them can easily fall off once the hair glue wears off. Also, since you’re cutting the weft before gluing it on top of the wig cap, you’re likely to lose some hair during the cutting process. Another downside is that you run the risk of damaging or drying out your hair due to hair glue, gel, or molding products.
Now let’s see glue-in weaving in action.
-<Preparation> Before you start, braid, or cornrow your hair if necessary. Apply your molding products, such as molding gels, before wearing a wig cap.
-<Wear a wig cap> Secure your hair with a wig cap to protect your hair and scalp from hair glue. You can also double-layer wig caps to protect the hair and scalp further, and a liquid cap can be added to prevent the hair glue from sticking to the natural hair and not coming off.
-<Dry the molding gel> If you applied molding gel or glue protectant to your hair or a wig cap, wait until it dries. You can use a hairdryer to save time. Make sure it is completely dry before attaching extension hair with glue.
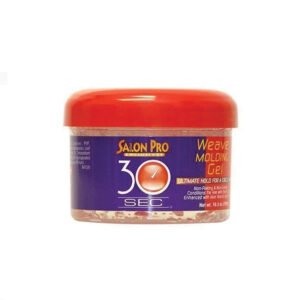
Molding Gel by Salon Pro. It helps keep the glue off the scalp.
-<Attach hair with glue> Measure the length of hair you want to glue around the head to see how much you need to cut, then start gluing from the back of the head. Let the previously glued hair completely dry before proceeding to the next piece. For the crown area, either use a closure or cut the crown section of a wig cap and pull out your own hair through the hole to complete the look.
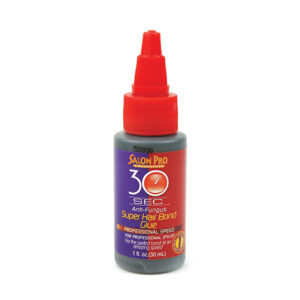
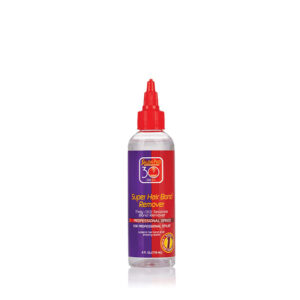
Hair glue and remover products by Salon Pro. If you choose the glue-in weaving method, you must use glue and remover products made for hair.
MIDDLE PART QUICKWEAVE WITH MINIMAL LEAVEOUT PROTECTIVE STYLE + BLENDING NATURAL HAIR WITH LEAVE OUT / YouTube@ Brittany Lashell
This tutorial shows how to leave the crown section braided and then take it out after quick weaving to create a natural-looking crown section.
3. Long Lasting Sew-in Weaving
For long-lasting hairstyles, the sew-in weaving method is a better option. This method typically allows for more styling options than the glue-in method. Sew-in weaves must be installed on the cornrows so that the thread and needle can pass through them for the hair to be attached. You can find a C-shaped or I-shaped needle for weaving. Once attached, it can be worn for 6-8 weeks. With sew-in weaves, you can wash and style your hair as if it were your own and even swim or shower with it. The best part is that it stays put like your own hair, so you can create any style you want, from bouncy long straight to voluminous curl styles.
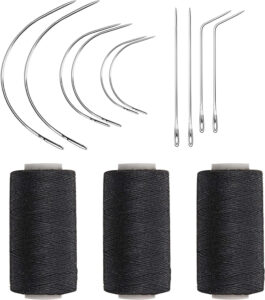
Thread and needle for sew-in weaving. You can use different shapes of needles as needed.
Drawbacks of sew-in hair: painful scalp
The main disadvantage of sew-in weave hair is that it can cause pain in the scalp, as the hair has to be pulled through the thread and needle to make the connection, and the weight of the hair puts constant pressure on the scalp, even causing headaches for some people. Removing sew-in weaves also requires professional help. Sew-in weaves can increase the risk of scalp infection from bacteria if not washed thoroughly. They also have the disadvantage of being more expensive to style because they take longer to install. Since you’re going to be wearing it for a long time, you will want to choose a quality weave hair, which means you’re going to pay more for the materials as well.
Learn how to install the sew-in weaves
-<the cornrows> Divide your hair into small sections and braid them close to the scalp to create cornrows.
-<Weaving the weaves> Sew the weaves into the cornrows. A hair net can be used to enforce the weaving over the cornrows, as it provides a more secure hold.
-<Horizontally to the crown> Continue sewing in a horizontal fashion, from the back toward the crown. It is important to attach it very close to the scalp for a natural look, and the crown of the head can be finished with a closure, or you can leave your own hair to blend in with the weaves for a more natural look.
How To Do A Traditional Seamless Sew-in Step By Step DETAILED
Youtube @ Duchess Braids
If your hair is fragile and breaks easily, or if you don’t have any hair, a hair net can help protect your hair from damage and give you a more durable style. This method takes the pressure off your scalp too.