Reporter Park’s Hair Trivia 101
Learn and Pass It On
Hair Extensions
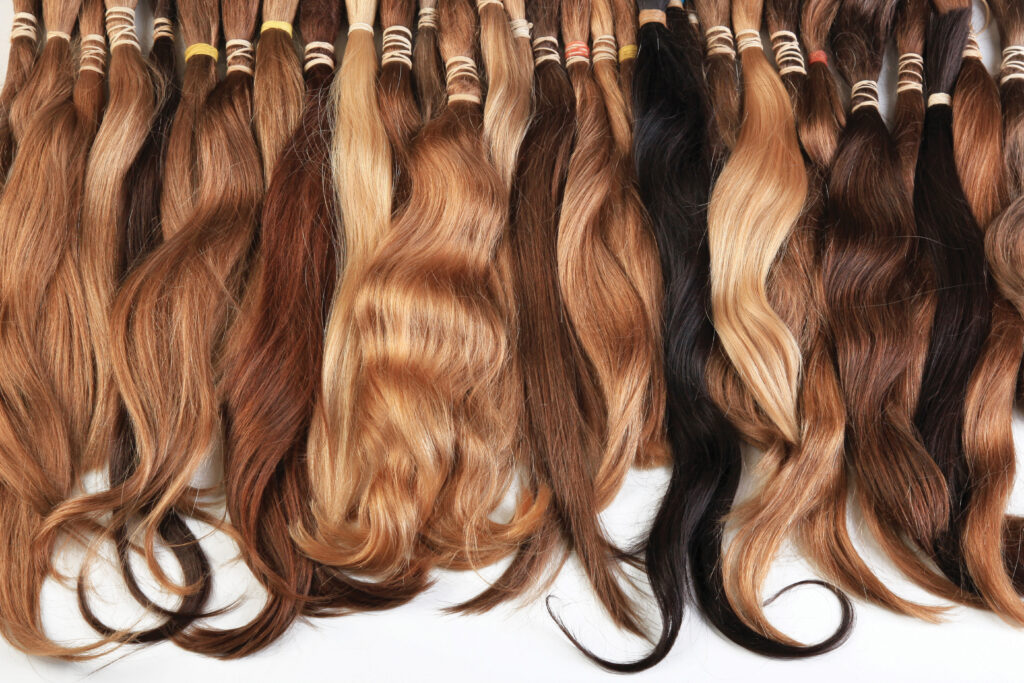
One of the biggest concerns for beauty supply store owners is information about the hair products they carry. When you are on top of the product information, you can confidently recommend products to your customers and make sales, but no matter how much you look at it, it is hard to fully learn about what it is and how to use it. To help overcome this frustration, we’ve created a new section called Hair Trivia 101. In this issue, we’ve broken down the different types of hair extensions into major categories and terminologies that are often used in the shops.
Hair Extensions by Attachment Method
Hair extensions can be mainly divided into Sew-ins, Clip-ins, Box Braids, Twists, and Crochet Braids based on their attachment method. It may sound complicated, but it’s quite simple after you learn about it. Sew-ins are those that you attach to your hair with a needle and thread, clip-ins are those that you secure with a clip, box braids are those that you braid into three strands, and twists are those that you twist into two strands. The crochet technique is to attach hair to the head using a crochet needle. An alternative to sew-ins is to use glue to attach them. Let’s look at each method in more detail.
1. Sew-Ins with Thread and Needles
As the name suggests, the sew-in method involves attaching extensions made of synthetic fibers (synthetics) or human hair to small, tightly braided cornrows with a needle and thread. Since the cornrows are tightly braided onto the scalp and the hair is held in place in the extensions, you take advantage of the gaps and carefully weave in the hair using the threaded needle. You can use a C-shaped needle or a straight needle, depending on your preference. It will hold more securely than using glue. While many Black women choose to avoid this method to protect their scalp, it has the advantage of lasting longer and looking more natural than other types of extensions. If the extensions are made of human hair, it’s reusable, but it can grow bacteria if left on the scalp for extended time, so it’s important to keep it clean.
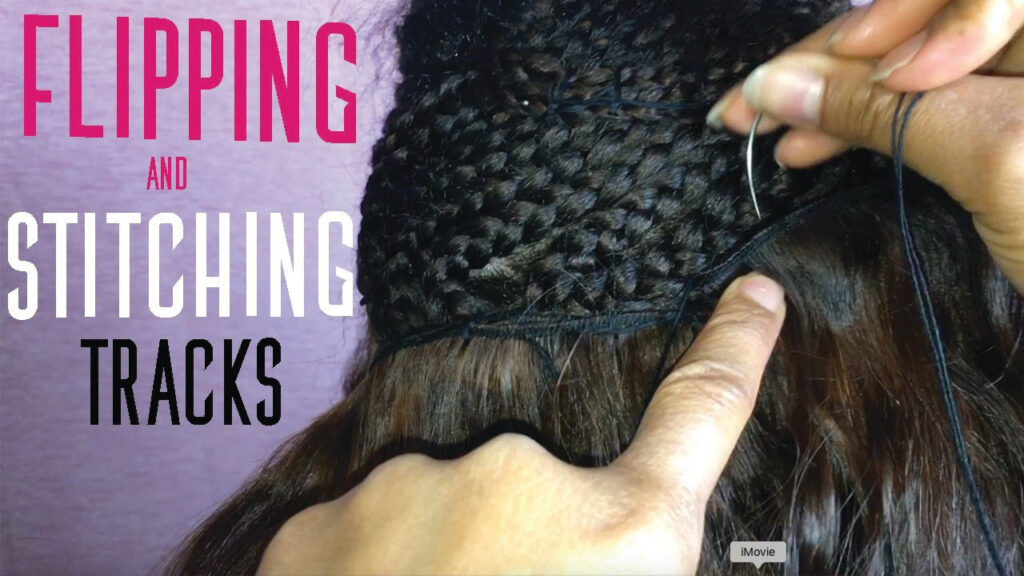
YouTube @It’s Me Miss Ruby – Flipping And Stitching Tracks – Detailed Weave Tutorial
Video explaining how to sew-in extensions on cornrows with a C-shaped needle
2. Clip in and clip out quick and easy
Clip-in extensions are an economical and inexpensive way to style your hair because you can apply them quickly and easily on your own, without having to go to a salon. It’s also the quickest way to add fullness or length to your hair, and it further secures your cornrows. It’s easy to put on in the morning and take off at night, doesn’t damage your hair and scalp, and doesn’t require heat or tools to attach. The downside is that the clip part may attach unevenly to the surface.
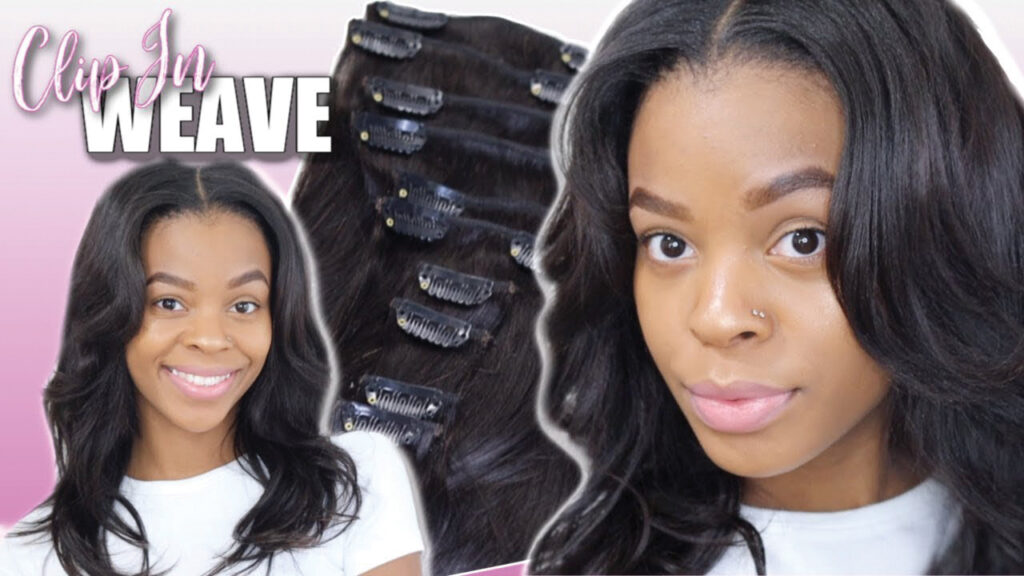
YouTube @ASTERIA HAIR – Bringing Back The “NATURAL” Weave ‼️ Clip ins On Texlaxed Hair || ft. Asteria Hair
This tutorial shows how to hold clips in place with the curly textured hair at the roots, and then straighten the rest of the hair with an iron.
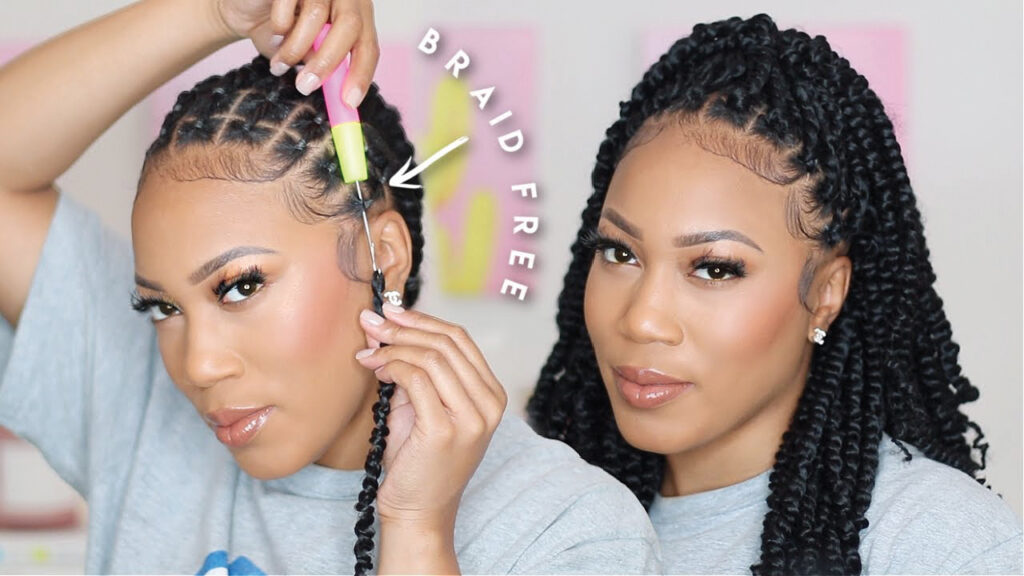
3. Box Braids and Twists: Braiding and Twisting Your Hair
Box braids get their name from the fact that when you box-braid your hair, the braids divide into a square box shape on your scalp. A twist is literally a way to take two strands and twist them together. It goes by different names depending on how you braid it, including micro braids, which are braided with a very small amount of hair at a time. Usually using synthetic hair, they offer endless styling options and typically last for 6-8 weeks once attached. Compared to other types of extensions, they allow better access to the scalp, which helps you keep the scalp clean, and if you sleep with a satin bonnet, they will be preserved and not tangled in the morning. On the downside, if the hair is too tight, it can irritate the scalp and cause hair loss, and if you’re allergic to synthetic hair, it can even cause inflammation. While you pay less for the hair extensions, they have a major drawback: they are expensive to install.
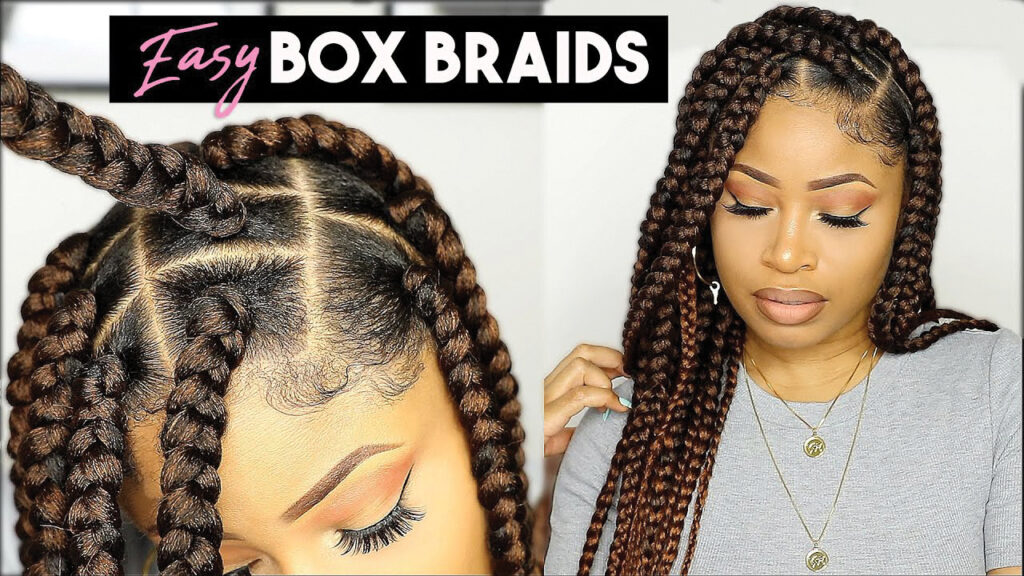
YouTube @TheChicNatural – Easy Summer Box Braids! (beginner friendly)
This tutorial explains how to do a box braid on your own. It’s called a box-braid because of the box-like shape appearing on the scalp as shown in the video.
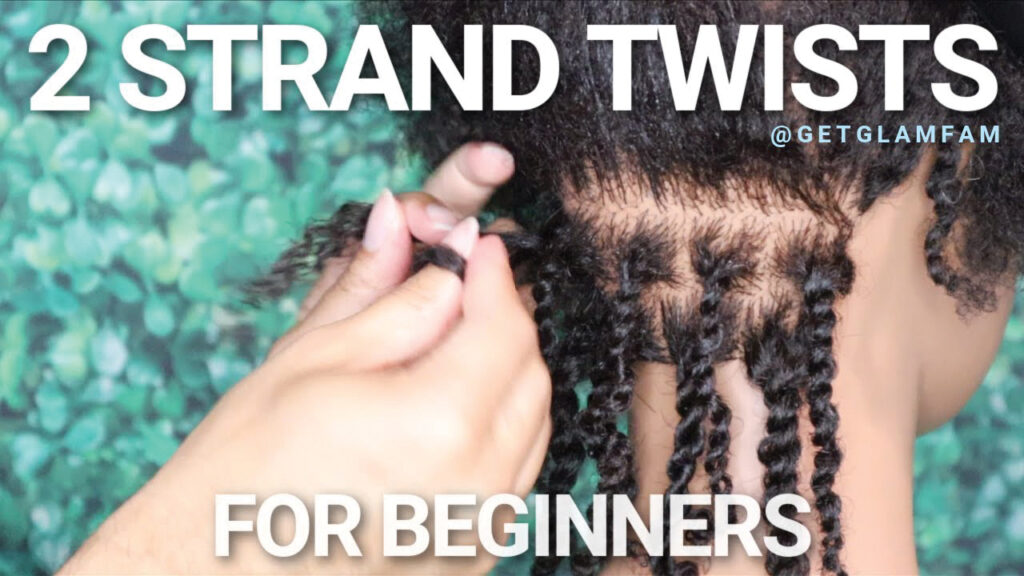
YouTube @ GlamFam Hair & Beauty – How to do 2 strand twists for beginners
This video shows you how to do 2-strand twists for beginners. This is a different styling technique from the box braid, which is a three-strand braid.
4. Crochet Braiding with Crochet Needles
Crochet braiding literally means hair extensions that are crocheted onto your cornrows using a crochet needle. They are relatively inexpensive and easier to attach than braiding or twists. With so many different products on the market, you can choose different curls and textures to suit your personality. These days, some come pre-braided or pre-twisted, while others are pre-looped to make it easier to thread a crochet needle through, making installation even easier.
YouTube @ForeverCryssy – Versatile Braidless Crochet Passion Twist Ft. Toyotress
The video demonstrates how to use a crochet needle to make a tight connection between hair extensions and cornrows.
5. Securing Extensions with Hair Bonding Glue
If there’s one product you should never run out of at a beauty supply store, it’s probably the glues. It’s relatively simple and easy than the sew-in method, but it can look messy if not done carefully and neatly, so you should pay attention. A method called “Quick Weave” utilizes cornrows covered with a stocking cap to minimize glue touching the scalp directly; you attach the weave hair with glue to the cap. It’s best to shampoo your hair thoroughly when using glues, as the glue will adhere better if your hair is free of excessive oil. Apply glue to the track portion of the weave extension hair (the top where the hair is stitched), wait a few seconds for it to become tacky, then stick it to the hair and press firmly. When removing the extensions, use a glue remover to carefully remove them avoiding damage to your scalp.
YouTube @ Tatyana Wstco – Versatile Quick Weave Tutorial
This tutorial demonstrates how to do a Quick Weave with glue on a stocking cap covering cornrows.
*** Bonus tips!
Sew-in/Glue followed by Closure for a Clean Finish
Once you’ve done a sew-in or glue installation of hair extensions on your cornrow up to the crown, how do you finish it off? You can leave some of your own hair to blend in with the extensions, but it’s not easy to match the color and texture. This is where closures come in. A hairpiece closure made of a lace or silk fabric with hair embedded in it is the cleanest way to finish off at the crown of your head. It can be sewn into the cornrows with a needle or glued flat to create a natural hairline. Depending on the product, some may allow you to part freely, while others may be fixed and not allow you to style as freely, so choose the product wisely. For a more natural look, you can apply foundation or concealer to make the part area of the closure appear as close to your scalp color as possible, and you can pluck the hairs on the closure to create a natural hairline that doesn’t look artificial.
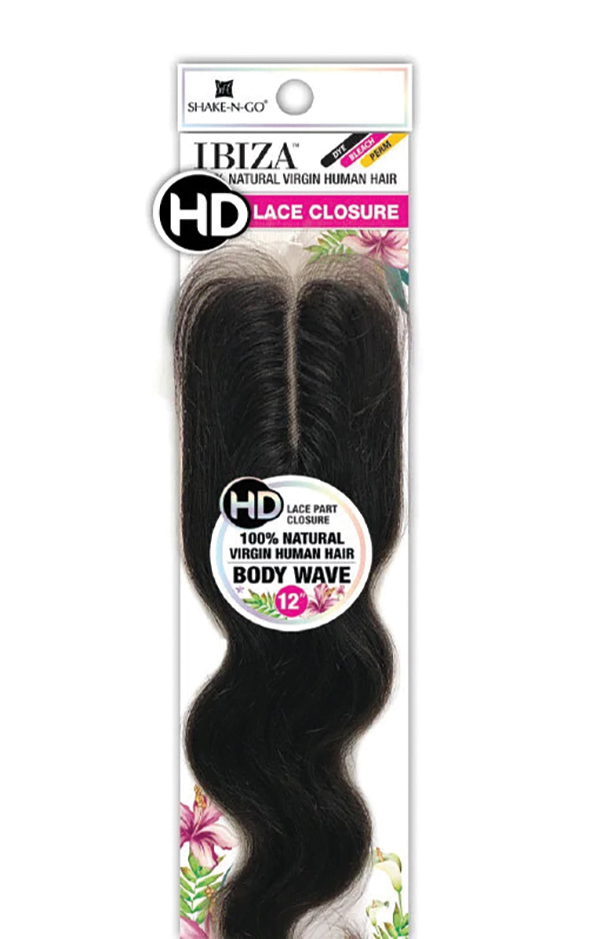
2.25″ X 4.5″ Body Wave 12″ HD Lace Closure / 100% Natural Virgin Human Hair 2.25″ X 4.5″ Lace Closure
Body Wave closure by Shake N Go. It’s made of lace, so the part appears very natural.

YouTube @ Chide lovesyou – Full Sewin No Lace, No Glue Ft. Julia Hair
You need a closure to naturally finish off the crown area after a sew-in installation.